
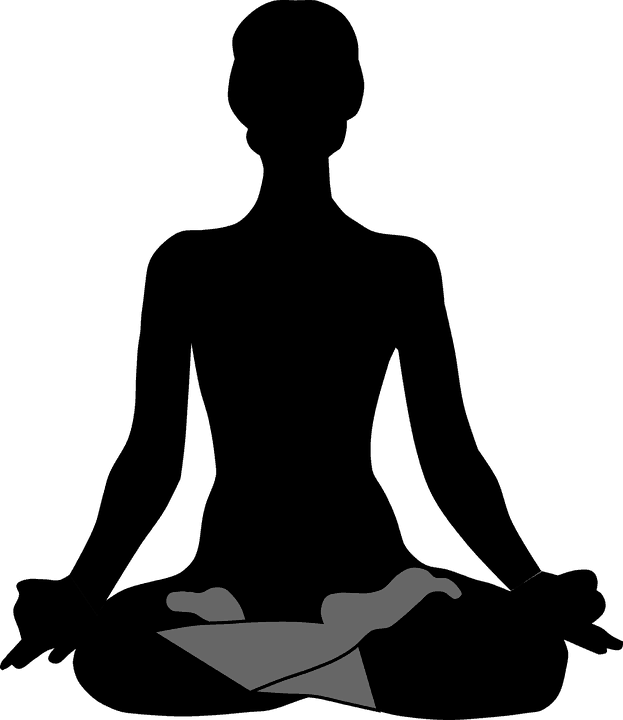
Lotus Pose or Padmasana is one of the most important of all yoga postures. By practising this posture your hips, knees and ankles start to loosen up and become flexible. It helps rejuvenate the nerves by allowing more blood to flow easily in your thighs and legs. Sitting in Padmasana (Lotus Position) also tones your spine, abdomen and upper back. Moreover, on the spiritual front, the Lotus Posture calms you down helping you to meditate or contemplate.
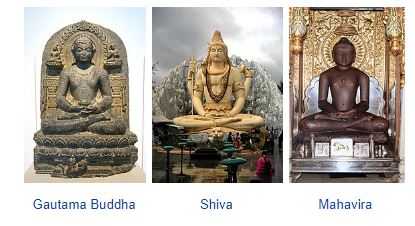
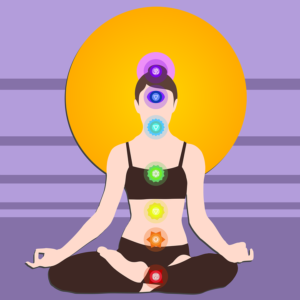
You must have often noticed statues or images of Lord Shiva (Hindu God), Lord Buddha (Founder of Buddhism) and Lord Mahavira (last Tirthankara of Jainism) sitting in the Lotus Posture. “The position visually symbolizes a triangle or pyramid that is said to harness life energy – knowledge, will, and action – or the mystical energy of power yoga practice.“The Hatha Yoga Pradipika from the 15th Century states – Lotus pose is capable to destroy all diseases. It also says – if yogins retain the Lotus position with air breathed in through the Nadi channels, they can attain liberation.
The Complete Lotus Pose, in reality, is a very difficult pose – thus, it is broken down in two poses where the first (Quarter-Lotus or Half-Lotus) steps are for beginners. It takes practice for the advanced (Full) Lotus Pose (Padmasana) to be achieved. Before we start the Steps of the Lotus Pose – let us see what are the precautions and the best time to do it. After that, we will proceed to describe the step by step guide to do the Lotus Position along with Images.
What are the Safety Precautions While doing the Lotus Pose (padmasana)?

Lotus Pose (Padmasana) could cause injury if done without guidance. Therefore, it is important to know the safety precautions before you start the Steps to do Padmasana.
- Avoid forcing your legs or ankles to go into the Lotus pose (Padmasana) – you could injure your knees or cartilage by squeezing them between your calves and thighs. Practise for some time before you achieve the flexibility to come into a full lotus pose.
- Make sure your hips rotate outwards freely at least 115 degrees in order to be qualified to do the Lotus Position. In case you are a beginner and a student – and cannot rotate your hips so much – compensate by bending your knee joints sideways.
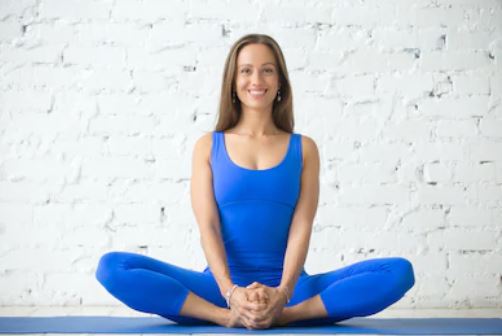
- A much safer alternative to this is the Baddha Konasana (Cobbler’s Pose) as long as you don’t push the knees down.
What is the best time to sit in Padmasana (Lotus Pose)?
Key is to take out time when it is convenient for you to take out those 15-20 minutes per day. The practice of Yoga can be done when you have no interruption or distraction. I would suggest doing this daily. If not daily, then at least 4-5 times a week is good enough for beginners.
- Similar to other exercises – doing Yoga in the morning will keep you energised throughout the day. However, if you do it on an empty stomach, before lunch or after you come back from work before supper or dinner – it is also good enough.
- Try and be regular no matter how busy or lazy you are. All you need is 15-20 minutes – that too as per your convenience.
In all the ancient scriptures great emphasis is given to keep your body, head and chest steady and upright. When you begin to meditate and concentrate – the body and the mind may get distracted. Your trunk begins to curve even without your knowledge. To avoid this the old Indian sages (Rishis) formulated four Meditation Postures: Sidhasana, Padmasana, Svastikasana and Sukhasana. All four postures can be followed during Breathing Exercises in Yoga (Pranayama) and Meditation (Dhyana).
Following steps will answer your frequently asked question:
How to do the Lotus Pose (Padmasana)? – Steps, Precautions and Benefits
Step 1: Right Place and Environment to sit in the Lotus Position
After having chosen a time when you want to do Padmasana (Lotus Pose) the first step is to find a suitable place to sit. Yes, we live in a home where doorbells and phones may ring, family members may talk, pets may distract you by their cute moves.
- Choose a place where you have enough place to spread your yoga mat. It could be either indoors or outdoors as per your choice. Moreover, you could be more uncomfortable sitting on the floor and want to do Breathing Exercises in Yoga while sitting. In that case, sit on a comfortable soft rug, cushion or a couch big enough to sit cross-legged.
- The place should be clean, airy and decluttered.
- The room or outside temperature should be normal meant to soothe your senses, rather than being too chilled or too hot – causing distraction.
- Also, you could light candles, incense sticks or camphor lamp to inhale the soft aromas in order to relax the mind, body and soul – in case you feel the need to. But, it is not compulsory to do so.
Step 2: Be Mindful of What you will Wear
Choosing the right clothing while practising meditation, breathing exercises (Pranayama) or Yoga Poses are extremely important. Clothes should be minimalistic and simple – to give you ease and freedom to sit, stretch, bend or twist.
- Yoga Pants and t-shirts are easily available online. In case you are on a shoe-string budget – just wear any of your loose comfortable pyjamas with a stretch and a matching comfortable T-shirt to practise Lotus Pose (Padmasana).
- Clothes should not be tight – because they restrict movement and flow of blood while doing the Yoga Poses or Asanas.
- Props, Mats or Balls used to aid your Yoga Poses can be easily found in Yoga Retail stores or even Sporting goods stores both in the market as well as online.

Yoga Pants
Step 3: How to breathe before you start Padmasana (Lotus Pose)?
Ujjayi Pranayama (Ocean Breathing or Cobra Breathing):
Ujjayi Pranayama also called Ocean or Cobra Breathing is the first stage to start the Lotus Pose (Padmasana). It is essentially breathing – to calm and balance your mind, body and spirit – much required before you start any Yoga Posture (for those of you who suffer hypertension refrain from practising this Pose).
- In this form of breathwork, you sit cross-legged on the Yoga mat or on a chair to learn diaphragmatic breathwork. Close your eyes and mouth gently while you relax your facial muscles.
- First, inhale through your nostrils by filling your lower belly, then rise to the lower rib cage finally filling the chest and throat fully with the inhaled breath.
- Next, exhale through your nose for the same duration as the inhalation. Feel the breath passing in and out of your windpipe concentrating on the sound of your breath. Inhale and exhale for 3-5 minutes before and after you go into and come out of any Yoga pose for best results.
- It helps you maintain a rhythm, increases oxygen levels and builds energy by clearing toxins from the body. Ujjayi Pranayama or Ocean Breathing is beneficial before the Lotus Pose (Padmasana) because it helps you stay in the present, remain grounded and builds self-awareness – lending it a meditative quality.
Step 4: How to prepare yourself for Lotus Pose (Pranayama)
Since Lotus Position requires your hips and knees to be flexible – to avoid discomfort and injury it is advised to do a few lighter Yoga poses, to begin with. These are specially designed to open your hips, strengthen your knees and make your spine flexible. Poses like the Head to Knee Forward Bend, Bandha Konasana or Butterfly Pose and Ardha Matsyandrasana (Half Lord of the Fishes Pose). It will prepare your body to go gradually into a half-Lotus and eventually into a Full-Lotus Pose. It may look like a simple pose but is better to be prepared for it – rather than going through pain and struggling.
I would suggest starting with a few standing postures before you do postures in which you sit down on the Yoga mat. After Ujjayi Breathing when you feel calm practise the Standing Forward Bend Yoga Pose or Padahastasana. This Yoga Pose is best for stiff legs as it uses the pull of gravity. It tones you right from the heels to the middle of the back preparing you for the Lotus Pose (Padmasana). Follow the Forward bend Pose by doing the Triangle Pose or Trolikasana as it tones the spine by giving it a lateral stretch. Moreover, it enhances the flexibility of the legs and hips preparing you for the Lotus Position. Follow this by less demanding seated hip openers like the Bandha Konasana or Butterfly Pose and Ardha Matsyandrasana (Half Lord of the Fishes Pose).
Bandha Konasana or Butterfly Pose in Yoga
This Yoga Pose is particularly designed to open your hips and give them strength.

- First, you sit on the floor or mat folding your knees closer and keeping them towards the ground so that your lower body warms up.
- Next step is to try and widen your hips in a manner so that your feet touch each other. As you do this gently pull your feet towards your groin area as comfortably as you can.
- Hold your big toe with your fingers to keep your feet in their place throughout the Butterfly Pose. Now, gently push your knees down a bit so that when you release the pressure your knees automatically come up. Repeat the upwards and downwards motions of your knees just like the flapping of a butterfly. Thus, making your knees flexible. Do this for 1-2 minutes to open up your hip joint. Soon you will be ready for the Lotus Pose (Padmasana).
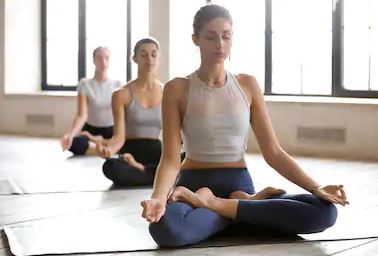
Step 5: Start with the Half Lotus Pose (Ardha Padmasana)
To attain the Full Lotus Pose (Padmasana) it is best to start mastering the Half Lotus Position (Ardha Padmasana).
1. Firstly, sit straight on the floor keeping your head and spine erect. Keep your shoulders square with your legs stretched out in front of you on the floor or mat. Let your mind and body relax and feel the breath go in and out of your body – giving you fresh life every time you inhale.
2. Hold your right feet and place it on your left thigh as you bend your knee. As you do this make sure the sole of your feet are facing up and the other leg is kept straight.
3. Idea is to maintain your balance while you do the same steps with your other foot as well. However, in this case, place your left leg under the right leg. So that the bottom of your left foot is placed under the right thigh.
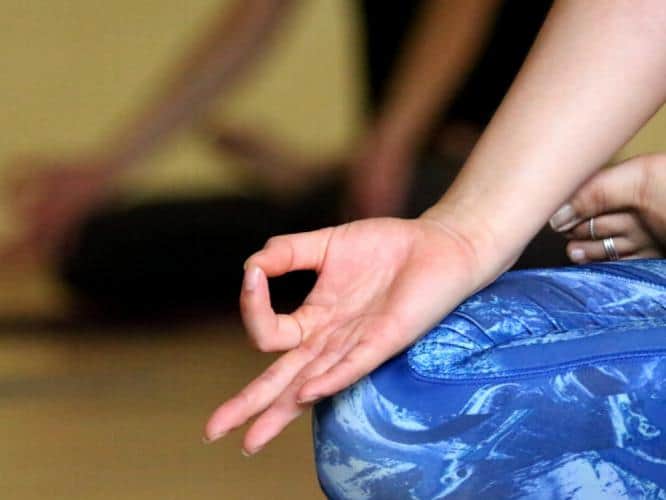
4. Now breathe in deeply as you bring your palm facing upwards to rest on your knees. Make the letter ‘o’ as you touch your thumb with your index finger while the rest of the fingers are straight (called the Chin or Gyan Mudra). While you do so – try and keep your forearms straight.
5. Stay in this position for a few minutes as you let your body relax for a few minutes. Only, stay in the position if you are comfortable (See pic). Lastly, switch the legs and do the Half Lotus Pose (Ardha Padmasana) again.
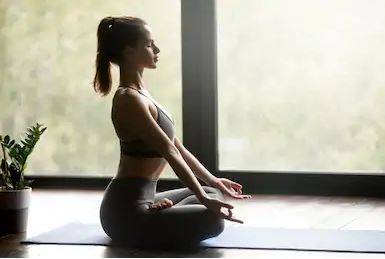
Step 6: Full LOTUS POSe (Padmasana) Steps
Each one of us as per our age and capability has flexibility and medical concerns. Therefore, if you have any health concerns related to your joints, hips or legs consult a doctor before you you go in for the Full Lotus Pose.
Step 1:
Sit on the floor on a yoga mat, meditation cushion or a blanket. Spread your legs forward as you keep your breath even after you do Ujjayi Breathwork. Arms resting on your side.
Step 2:
Bend your right knee so that it points outwards from the hip and the bottom of your right foot faces upwards. The sole of your foot should be facing upwards and rest on the left thigh near to the area where your left hip bends.
Step 3:
Always keep the trunk, head and neck upright. No bending, please. Consider, this is a common instruction for all sitting meditation postures. Next, bend your left knee so that you can place the left foot on top of your right thigh near the area where your hip bends. Your ankles will feel the pressure when you do the full Lotus Pose. Thus, be careful that you do not twist it so much that you injure it. To ease both the feet resting on your thighs – bring your knees together making a narrow cross-legged kind of position. Try and sit straight and lift your ankles while the sole of your feet faces upwards. Thus, easing the pressure on your shins.
Step 4:
Lastly, you can keep the left hand over the left knee and right hand over the right knee. While doing this make sure your palms are facing upwards. Allow your index fingers to bend and touch the middle portion of the thumbs keeping the other fingers stretched out. This is the Chin mudra.
An alternative to the above is you could lock your fingers and let your palms face upwards over your left ankle. Symbolically, your right hand represents compassion, however, your left hand represents wisdom. Here you bring both these together by locking your fingers.
Step 5:
Inhale and exhale deeply while you are in the Full Lotus Pose.
Step 6:
To come out of the pose – release the legs by stretching them out on the floor gently. Be aware of your breath and meditate as you come out of the Full Lotus Pose.
Tip:
During the Lotus Posture, start by sitting for two-ten minutes and slowly increase the duration as per your convenience and comfort.
Step 7: Lotus Position (Padmasana) Variations
In case the Lotus pose causes you any kind of discomfort since you are a beginner – think about going in for variations to be safe until you excel in the Yoga Pose. Variations are also recommended for those of you who have already mastered the art of Full Lotus Position.
1. Fold a Blanket with a non-slippery texture and place it under both knees until you achieve flexibility. It forms a good cushion to fill in the gap between the body parts and the floor mat.
2. Start with Ujjayi Breathing to prepare your body to sit calmly in the half Lotus Position.
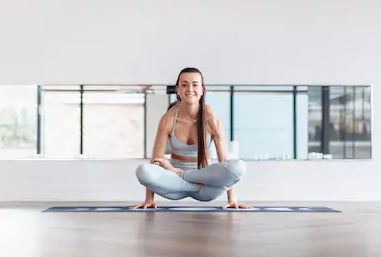
3. To challenge yourself – you could even try the Scale Pose (Tulasana). Do this by holding your palms into the floor with palms facing down on the floor mat along your hips. Next, lift your buttocks and legs while you are cross-legged – off the floor mat with the entire body weight on your arms. Now swing your body slightly to give you additional strength.
4. For those of you who have achieved the Lotus Pose and want to go a step higher – try the Bound Lotus Pose (Badha Padmasana). It helps you to fully express the Lotus Pose (Padmasana). Here you cross your arms behind your back and hold your opposite toes with your fingers from behind while you are in the Lotus Pose. To go deeper into the asana – fold forward.

5. You can do other Yoga Pose Variations while your legs are still in Padmasana (Lotus Position); Fish Pose (Matsyasana), Shoulder Stand (Salamba Sarvangasana) and finally the Headstand (Sirsasana).
Take-Home
The above poses can help you prepare for Padmasana (Lotus Pose) yet, what is most important is to remember to practise non-violence (Ahinsa) when you are doing it. I would suggest always take the guidance and help of a Yoga Instructor who understands your body type and can help you to align your body for the Full Lotus Pose. Never ignore any pain – be it in your knees or ankles. Check with your instructor on precautions as and when you progress in the preparation of the Yoga Pose. It may take some time before you achieve the Full Lotus Position (Padmasana), thus don’t be in a hurry and be harsh with your body. Yoga is about your mind, body and soul aligned with each other and it comes with continuous practise and effort.
Related Articles
Do you know Yoga Poses can Prevent and Cure Knee Pain?
Cobra Pose (Bhujangasana) and its Benefits in Yoga
5 Tips to practise Yoga While Travelling
Best time to so Headstand (Sirsasana) – can you do it in the evening?

One Response