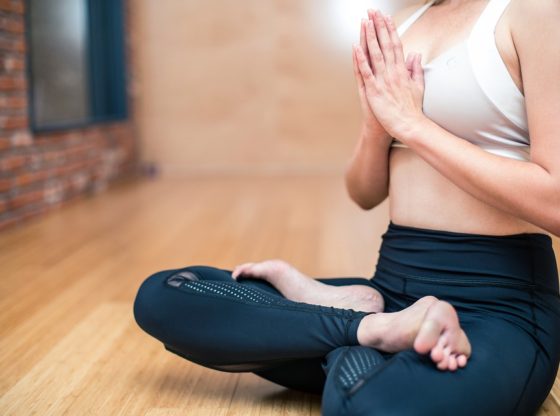
‘Meditation’ and an increased interest in ‘How to Do it’ are seen in the Millenials. One of the most asked questions, when I conduct meditation classes, is – “How should one sit in meditation postures?” I receive innumerable requests from my Social Media followers looking for an answer to “What is the correct sitting posture while practising meditation?”
In modern-day you will see people meditate, not for religious purpose but for mental peace, boost memory, increase self-awareness, relaxation and raise spirits higher. However, students meditate to increase their cognitive ability. You can sit in many postures – like the Lotus Posture (Padmasana) or the Cross-legged Posture (Svastikasana). Thus, you can meditate by sitting – ‘with support’ or ‘without support’ depending on your body’s flexibility.
Meditation Postures Do’s and Dont’s
Sitting posture is considered the most preferred posture during meditation practise. Postures are not dependent on your body shape and size. While meditating what is vital is your mental poise.
- Align your Spine: As per an ancient analogy imagine your spine to be like coins on top of each other. It must seem as if a rod could go through the top of your head and down the bottom of your spine. You should feel uplifted when you sit down in a meditation posture.
- Relax your mind by relaxing your Body: Comfort should be a priority before you start to meditate. Sit upright with your back, neck and head aligned and comfortable without leaning or hunching. Let your hands stretch out to rest your palms on your lap without any effort. Do not tighten the muscles of your neck, shoulders, knees or arms. Thus, sit in a manner so that you can maintain the posture throughout the meditation.
- Steady the Mind: Always try to keep your eyes shut and pay attention to your third eye while you are in the meditation posture. If you cannot keep your eyes shut focus on a point in front of you. The meditation posture should not make you feel like moving or become painful. Therefore, rock your body side to side to find a centre to balance your body before you start. The idea is to keep the thoughts away from your body.
“If the mind is wandering, you cannot have a steady body or a steady physical pose. When the mind is steady or fixed in Brahman, the steadiness of the body automatically follows.” – Divine Life Society
Meditation Postures for Beginners – Sitting with Support
Sitting on the Floor:
If you are a beginner and cannot sit without support – sitting with your back against a wall is recommended in this meditation posture. You may not have access to a wall exposed enough to take support. Then, take the support of straight furniture like a book cabinet that is sturdy. Most importantly, for those of you with a backache or an injury, please consult with your doctor beforehand. You should know the duration for which you can sit upright while you meditate. Key is to find a comfortable spot and posture for yourself.
If you feel uncomfortable sitting directly on the floor, feel free to sit on a Yoga Mat, Sturdy Meditation Cushion or a folded bed cover. But, keep your legs folded in a cross legged-position or extended as per your ease.
Lying Down:
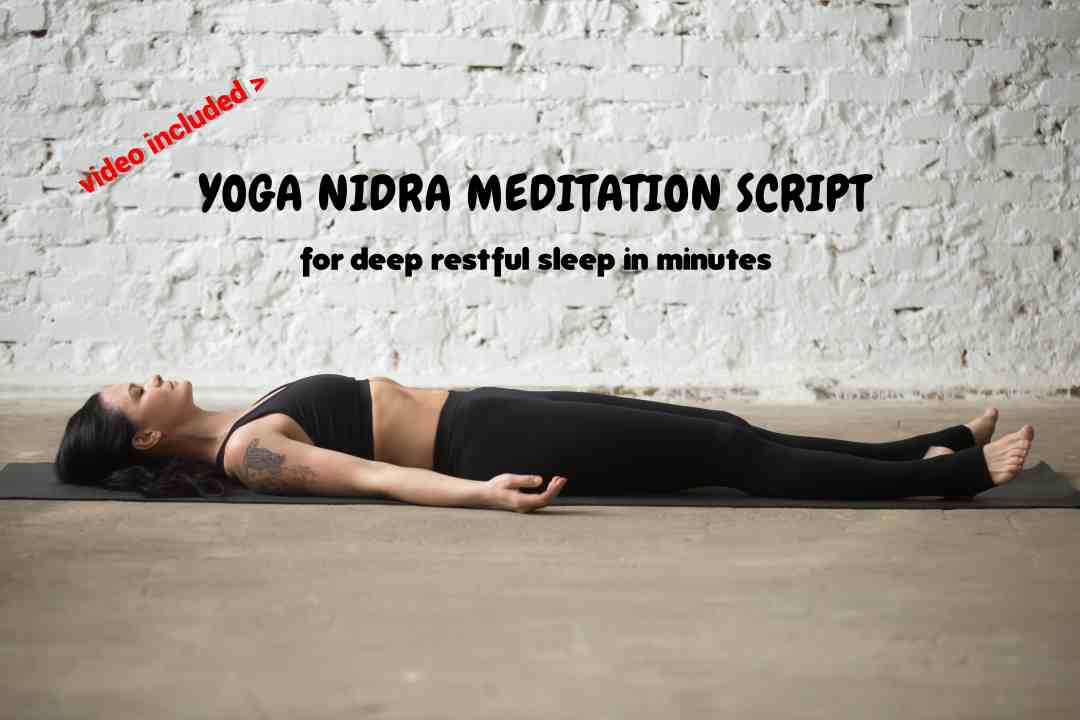
Now you may ask like many others do if you can meditate while you are lying down. People who do this tend to fall asleep. Therefore, if you choose to lie down and meditate keep your feet flat on the yoga mat or bed and lift your knees upwards to feel as if you are awake.
Sitting on a Chair:
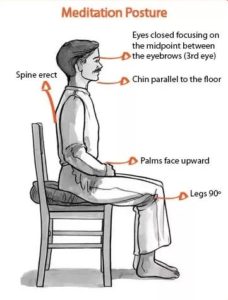
Yes, meditation posture of sitting on a chair is okay, only if it is really necessary. Never feel ashamed if you sit on the chair to meditate. Make sure you sit with your feet placed firmly on the floor.
Keep your back away from the chair so that your knees are at a 90-degree angle and properly aligned with your hips. Use cushions or roll some bed linen to support your back in between the chair and you. Sitting straight also tends to make your back muscles stronger. In case it is tough for you to sit straight work towards this posture by strengthening your core with easy Yoga Exercises.
Top Sitting Meditation Postures you can practise
In all the ancient scriptures great emphasis is given to keep your body, head and chest steady and upright. After you begin to meditate and practise concentration – the body and the mind may get distracted. Your trunk begins to curve even without your knowledge. To avoid this the old Indian sages (Rishis) formulated four Meditation Postures: Sidhasana, Padmasana, Svastikasana and Sukhasana. All four postures can be followed during Breathing Exercises in Yoga (Pranayama) and Meditation (Dhyana).
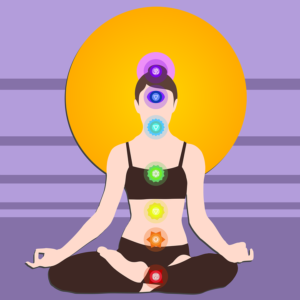
I.i) LOTUS POSTURE (Padmasana) TECHNIQUE
Step 1:
Sit on the floor on a yoga mat, meditation cushion or a blanket. Spread your legs forward.
Step 2:
Gradually bring the right foot and place it over the left thigh. After that, you should bring your left foot and carefully keep it over your right thigh.
Step 3:
Always keep the trunk, head and neck upright. No bending, please. Consider, this is a common instruction for all sitting meditation postures.
Step 4:
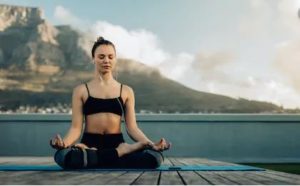
You can keep the left hand over the left knee and right hand over the right knee. While doing this make sure your palms are facing upwards. Allow your index fingers to bend and touch the middle portion of the thumbs while the other fingers are stretched out. This is the Chin mudra.
An alternative to the above is you could lock your fingers and let your palms face upwards over your left ankle. Symbolically, your right hand represents compassion, however, your left hand represents wisdom. Here you bring both these together by locking your fingers.
Tip:
During the Lotus-Meditation Posture, start by sitting for ten minutes and slowly increase the duration as per your convenience and comfort.
For those of you who find it difficult to start with the Full Lotus Pose here are two Variations to the Sitting Meditation Posture:
I.ii) Quarter-Lotus, and
I.iii) Half-Lotus Posture (Pada-Padmasana and Ardha-Padmasana)

The most revered sitting meditation posture of all times is the Lotus Posture. It is difficult to remain in the posture for more than a few minutes – therefore variations could be an easier alternative. They have similar benefits and prepare you for a higher level of Lotus Posture.
Step 1:
In this meditation posture, you sit upright on the floor mat or cushion. Now, stretch both your legs forward on the mat.
Step 2:
In the Quarter-Lotus Posture, you bring the left foot and place it under your right thigh in a cross-legged position. After that fold your right leg at the knee and place it over your left calf.
Difference between a quarter-Lotus posture and half-Lotus posture is:
In the quarter-Lotus Posture you keep your right foot over your left calf, however, in the Half-Lotus Posture you place your right leg over the left thigh. Rest all the steps are the same.
Step 3:
Keep your left hand over the left knee and right hand over the right knee while your palms are facing upwards. Bend your index fingers so that they touch the middle portion of the thumbs with the other fingers stretched out – forming the Chin Mudra (pose).
Tip:
You may find sitting in these meditation postures a little difficult if you have less flexible hips and ankles. If so, try sitting on a small cushion to help elevate your body to support your folded legs from underneath. It will give you stability. Yet, strive to do the Full Lotus-Posture for maximum benefits.
Ii) Accomplished or Adept Posture (Sidhasana) technique
‘Sidhasana’ is known to be the most revered sitting Meditation Posture after Lotus Pose. It is one of the best asanas (postures) while meditating or breathing during Yoga. As per sacred texts if you practise this posture it cleanses all your energy channels (72,000 nadis). It is through these nadis that your prana ( life force) flows. In Hatha Yoga ‘Sidhasana’ is named after a Sanskrit word ‘Siddha’ means ‘accomplished’ or ‘adept’ thus the English name. And, asana means ‘posture.’
As per Yogapedia “Nadi is Sanskrit word that can be translated as “tube,” “channel” or “flow.” It refers to the network of channels through which energy travels through the body.”

Step 1:
Sit comfortably on a mat or sturdy cushion on the floor. Stretch your legs outwards.
Step 2:
Bend your left leg at the knee and place the heel at the anus – it is the terminal opening of your digestive tube or alimentary canal. Now, keep your right heel at the root of the generative organ. Arrange your legs and feet in a manner so that the joints at the ankle touch each other.
Step 3:
You can place your hands exactly as you do in the Lotus Posture (Padmasana).
Keep the left hand over the left knee and right hand over the right knee. When you are doing this make sure your palms are facing upwards. Take your bent index fingers to touch the middle part of the thumbs. While the other fingers are stretched out.
Tip:
It is an easier pose than the Lotus. Thus, can be easily practised by anyone other than the ones with joint pain, spine or back pain.
iii) Cross-Legged Posture (Svastikasana) technique
Step 1:
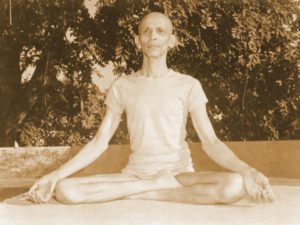
Sit on the floor or on a mat or cushion. Stretch out your legs forward.
Step 2:
Fold your left leg so that it is placed near the right thigh muscles. In the same manner, fold the right leg at the knee and insert it in between the space of the left thigh and calf muscles. Both your feet are now between your calves and thighs.
Step 3:
For hand posture – follow the steps same as Lotus Pose (Padmasana).
Tip:
You should not fold the legs very tight or else you will feel as if your feet are getting pressed or uncomfortable at any point. Loosen them as per your flexibility and strength.
Iv) Adamantine Posture (Vajrasana)

Step 1:
Kneel on the floor while you are on the Yoga or meditation mat. Gradually rest your buttocks between the heels. The heels should not hide under you and the edges should be visible behind your buttocks. When you do this pay attention to your calf muscles as they should touch your thighs. The area from your toes to the knees should be touching the floor.
Step 2:
Your entire body weight should be resting on your ankles and knees. It is normal to feel the knee and ankle joints stretch or pain a bit when you start practising Vajrasana.
Step 3:
Keep the left hand on the left knee and right hand on the right knee with palms facing down.
Tip:
When you practise Admantine or Vajrasana keep your neck and spine upright. It is very comforting for a lot of people when they sit in this position as it has many benefits.
Related Articles:
20 Important Spiritual Instructions by Sri Swami Sivananda
12 Steps on How to do Meditation for Beginners
How to fix bad posture at Work
How to do Mantra Chanting meditation and Types of Chants
Yoga Poses to Improve Bad Posture at Work
How Meditation Changes Your Brain
http://wordpress-334546-1028402.cloudwaysapps.com/how-does-meditation-changes-the-brain-wellnessworks/
References:
1. http://www.sivanandaonline.org/public_html/?cmd=displaysection§ion_id=1418&format=html
2. https://www.rishikulyogshala.org/top-5-yoga-meditation-positions-poses/
3. https://www.wikihow.com/Sit-During-Meditation
4. http://www.meditationmojo.com/meditation-articles/meditation-for-beginners/how-to-sit-for-meditation
5. https://www.yogajournal.com/meditation/everything-need-know-meditation-posture
6. https://mindfulminutes.com/how-to-sit-for-meditation/
7. https://www.ananda.org/meditation/meditation-support/articles/how-to-sit-comfortably-in-meditation/
8. https://chopra.com/articles/what%E2%80%99s-the-right-way-to-sit-for-meditation
9. https://aboutmeditation.com/beginners-guide-sitting-meditation/
10. https://www.healthline.com/health/mental-health/meditation-positions
11. http://www.sivanandaonline.org/public_html/?cmd=displaysection§ion_id=1234&format=html
12. http://www.sivanandaonline.org/public_html/?cmd=displaysection§ion_id=838&format=html
13. https://www.rishikulyogshala.org/top-7-health-benefits-of-siddhasana-accomplished-pose/
14. https://www.yogapedia.com/definition/5028/nadi


